Please Choose Your Language
Views: 0 Author: Site Editor Publish Time: 2026-06-11 Origin: Site


Commercial pet treats frequently face recalls due to contamination and synthetic preservatives. Pet owners increasingly seek safer snack alternatives for their animals. Making snacks at home puts you completely in control of the ingredient list.
However, dehydrating at home offers quality control only if you achieve safe moisture activity levels. Guessing temperatures often leads to "case hardening," where snacks feel dry outside but stay moist inside. This trapped internal moisture creates an ideal breeding ground for harmful pathogens. Incorrect heat application can also destroy heat-sensitive vitamins found in fresh produce.
We will provide a standardized thermal guide for processing raw meats and garden produce safely. You will learn the exact temperature parameters needed to prepare different ingredients. We also offer a framework for evaluating the right Food Dehydrator to execute these recipes flawlessly.
Meat Safety: Raw meats require a minimum dehydrating temperature of 160°F (71°C) to eliminate Salmonella and E. coli.
Produce Preservation: Fruits and vegetables require lower temperatures (125°F–135°F) to retain heat-sensitive vitamins.
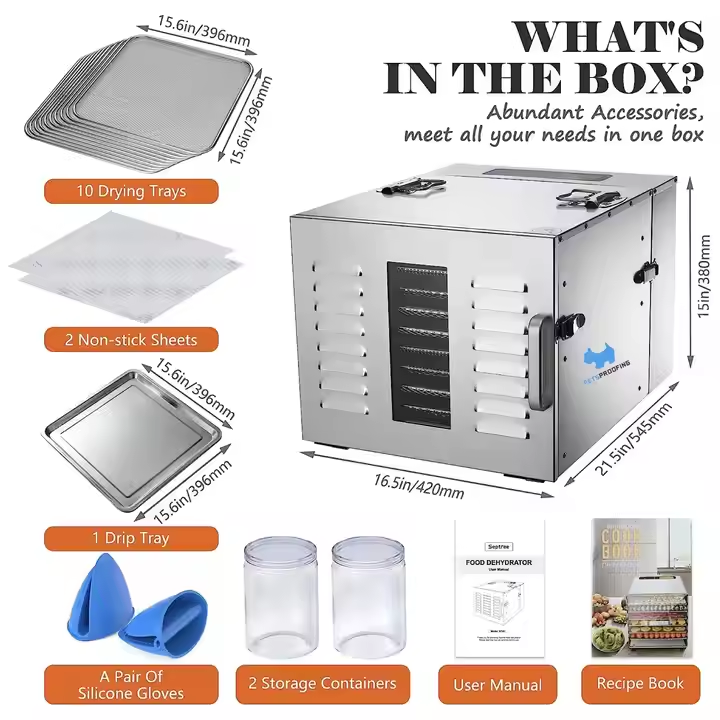
Equipment Mandates: A stainless steel digital food dehydrator is highly recommended for meat processing due to superior temperature precision and sanitation capabilities.
Validation: Visual inspection is insufficient; proper "conditioning" and snap-testing are required to confirm shelf stability.
Drying food fundamentally changes its molecular environment. The primary objective is lowering water activity, scientifically known as $a_w$. Water activity measures the unbound water available to support microbial life. Fresh meat and produce have high water activity levels above 0.95. Bacterial and fungal growth completely halts when you drop the $a_w$ below 0.60. Achieving this specific benchmark ensures long-term shelf stability without artificial preservatives. You cannot measure $a_w$ directly at home. Instead, you must rely on strict temperature controls and processing times to guarantee safe results.
Processing raw proteins introduces serious microbiological risks. Meat must undergo a precise lethality step. Raw beef and pork must reach an internal temperature of 160°F rapidly. Poultry requires an internal baseline of 165°F. You must achieve these temperatures before the drying process creates an insulating outer shell. Pathogens like Salmonella and E. coli thrive in warm, moist environments. Slow heating allows these bacteria to multiply exponentially. Reaching the lethality temperature quickly destroys these organisms completely. Once destroyed, the ongoing drying process safely removes the remaining moisture.
Applying extreme heat too quickly creates severe structural failures. This phenomenon is called case hardening. The exterior of the food dries almost instantly, forming a tough, impenetrable crust. This hardened shell physically traps moisture deep inside the ingredient. Case-hardened treats look perfectly dry and finished on the outside. Inside, they remain dangerously moist and prone to rapid spoilage. You avoid case hardening by matching the correct temperature setting to the specific ingredient density. High moisture foods need gradual moisture extraction, not aggressive searing.
Different ingredients demand completely different thermal approaches. Following specific time and temperature rules prevents spoilage and maximizes nutritional value. Below is a quick reference chart summarizing the core processing parameters.
Standardized Dehydration Parameters | |||
Ingredient Category | Target Temperature | Estimated Duration | Key Pre-treatment |
|---|---|---|---|
Meat & Organ Meats | 160°F – 165°F (71°C – 74°C) | 4 to 12 hours | Slight freezing for uniform slicing |
Vegetables | 125°F – 135°F (52°C – 57°C) | 6 to 10 hours | Steam blanching |
Fruits | 135°F (57°C) | 8 to 15 hours | Ascorbic acid dip |
Proteins require the most aggressive thermal processing. Set your thermostat between 160°F and 165°F. Processing duration spans 4 to 12 hours depending heavily on slice thickness. Organ meats like liver take longer due to dense tissue structures. Proper pre-treatment makes a massive difference in outcome consistency. Place raw cuts in the freezer for two hours before preparation. This slight freezing firms up the muscle fibers. Firm meat allows you to slice uniformly, ensuring all pieces dry at the exact same rate. You should also marinate meats safely inside the refrigerator rather than at room temperature to limit initial bacterial growth.
Fibrous root vegetables and green pods require moderate heat. Your target temperature range falls between 125°F and 135°F. Processing times generally run from 6 to 10 hours. High heat destroys delicate vitamins and degrades natural flavors. Vegetables also contain active enzymes causing rapid color and flavor loss. You must blanch fibrous vegetables before drying them. Drop sliced carrots or green beans into boiling water for two minutes, then transfer them into an ice bath. This breaks down the cellular walls and neutralizes degrading enzymes. Blanched vegetables dry significantly faster and retain their vibrant colors.
Fruits require a delicate balance of heat and airflow. The optimal target temperature rests firmly at 135°F. Fruits contain high concentrations of natural sugars and water. Therefore, they demand the longest duration, typically 8 to 15 hours. Dense berries may take even longer if left whole. Dedicated fruit processing relies heavily on consistent air circulation. Finding a dedicated Food Dehydrator for Fruit Vegetable processing ensures proper airflow dynamics. Sugary fruits stick easily to standard racks. Specialized units often provide fine-mesh screens and gentle, circulating heat. This prevents sugar crystallization and prevents natural juices from dripping onto heating elements.
Selecting the right equipment dictates the safety and quality of your homemade pet treats. Basic consumer models often lack the technical precision required for processing raw proteins. You must evaluate machines based on thermal accuracy, airflow design, and physical capacity.
Verify Thermostat Precision: Check the thermostat control mechanism first.
Analyze Airflow Design: Determine fan placement and air circulation routes.
Calculate True Capacity: Measure the usable square footage of the drying trays.
Assess Material Durability: Evaluate the construction of the housing and racks.
Thermostat precision stands as the most critical safety feature. Analog dials often fluctuate wildly by ±15°F during a standard drying cycle. A machine set to 160°F might actually operate at 145°F. This creates a catastrophic failure point for meat safety. Digital thermostats maintain strict microclimates inside the chamber. They sample the ambient air constantly and adjust the heating element in real-time. Digital controls represent a non-negotiable requirement when you handle raw proteins.
Airflow architecture determines how evenly your ingredients dry. Horizontal airflow systems feature a large fan mounted at the rear of the unit. This setup pushes hot air evenly across all trays simultaneously. It prevents flavor mixing and ensures uniform moisture removal. Rear-mounted fans are ideal for thick meat cuts. Vertical airflow systems place the fan at the bottom or top of the unit. Air must push vertically through the stacked trays. This design requires manual tray rotation every few hours to prevent uneven drying. Vertical designs handle fruits and vegetables well but pose high risks for thick meats.
You must balance tray capacity against your kitchen footprint. Do not evaluate capacity strictly by the number of trays. Calculate the total square footage available. A ten-tray vertical unit often holds less raw ingredient weight than a six-tray horizontal commercial unit. Consider your batch processing needs carefully. Making a week's worth of treats requires significantly less surface area than preparing a month's supply. Overcrowded trays restrict airflow, double processing times, and increase spoilage risks. Buy slightly more capacity than you currently need to accommodate future recipe expansion.
Entry-level models use plastic extensively. Premium machines utilize commercial-grade metals. Your choice impacts sanitation, lifespan, and overall safety. Processing raw meat demands stringent hygiene practices.
Equipment Material Comparison | ||
Feature | Plastic Construction | Stainless Steel Construction |
|---|---|---|
Sanitation | Harbors bacteria in micro-abrasions | Non-porous, completely sanitary |
Maintenance | Requires careful hand washing | Dishwasher safe components |
Heat Retention | Poor insulation, slow recovery | Excellent insulation, rapid recovery |
Chemical Risk | Potential leaching at high heat | Zero chemical leaching |
Raw meat leaves stubborn lipid and protein residues behind. Plastic trays degrade slowly over time when exposed to acidic marinades and abrasive cleaning sponges. This degradation creates tiny micro-abrasions across the plastic surface. These invisible scratches harbor dangerous bacteria perfectly. Even vigorous scrubbing cannot clean micro-abrasions entirely. Using degraded plastic trays for subsequent batches invites severe cross-contamination. You compromise the safety of your pet treats when sanitation fails at the equipment level.
Upgrading your equipment provides immense peace of mind. A true Stainless Steel Digital Food Dehydrator provides the best long-term return on investment. The racks withstand aggressive scrubbing and remain completely non-porous. You can place the stainless components directly into a commercial dishwasher for high-heat sanitization. Furthermore, stainless steel eliminates all concerns about BPA or BPS chemical leaching during long, hot drying cycles. Heavy metal construction also provides superior thermal mass. The chamber retains heat beautifully and recovers processing temperatures rapidly after you open the door to check ingredients.
Consider the true cost-to-lifespan ratio. Entry-level plastic models feature lower upfront costs. However, their heating elements burn out faster. Their plastic trays warp under high heat and eventually crack. You will likely replace a budget plastic model every two years. A premium stainless machine easily operates flawlessly for a decade. Framing the higher initial purchase price against replacement frequency makes heavy-duty equipment the smarter economical choice for regular treat production.
The drying process does not end when you turn off the machine. You must validate moisture removal physically. Visual inspection alone leads to dangerous storage mistakes. You must implement strict testing and conditioning protocols.
Perform a physical snap test on cooled ingredients.
Condition all batches in sealed glass jars.
Monitor containers daily for condensation.
Utilize vacuum sealing for long-term freezing.
Add food-safe desiccant packets to room-temperature storage.
The snap test confirms proper internal moisture levels. You cannot test hot food. Remove a few pieces from the machine and let them cool completely on your counter. Meat jerky should bend significantly and crack, revealing tight white fibers, but it should not snap completely in half. If it breaks like a twig, you over-dried it. Fruit pieces should feel pliable and leathery. They must not feel sticky or wet when squeezed. Root vegetables like sweet potatoes should snap cleanly and rigidly. If vegetables bend, they need more time in the chamber.
Passing the snap test initiates the conditioning phase. This mandatory step equalizes residual moisture. Even in the best machines, some pieces dry slightly faster than others. Place the cooled treats loosely into large, airtight glass jars. Keep them on your counter for 7 to 10 days. Shake the jars vigorously once a day. This action distributes the remaining internal moisture evenly across the entire batch. Watch the glass carefully. If you see any condensation forming on the inside of the jar, return the entire batch to the machine immediately. Condensation indicates dangerous moisture levels that will cause rapid molding.
Proper storage dictates ultimate shelf life. Oxygen and humidity remain your biggest enemies. Keep short-term batches in airtight containers in a cool, dark pantry. Add a food-safe silica desiccant pack to absorb ambient humidity. For medium-term storage, place the sealed containers in the refrigerator. To achieve maximum shelf life, vacuum seal your conditioned treats in heavy-duty plastic bags. Store these vacuum-sealed bags in a deep freezer. Frozen, vacuum-sealed treats retain their nutritional value and safety profile for many months. Thaw them gradually in the refrigerator before feeding them to your pet.
Safe pet treat dehydration requires strict adherence to precise thermal guidelines. Pathogen elimination demands high initial heat, while nutrient preservation requires low, steady air circulation. You must match these exact biological parameters to capable hardware. Guesswork leads directly to spoilage and illness.
Prioritize digital temperature controls and easily sanitized materials over budget-friendly aesthetic features. High-volume or meat-heavy production necessitates horizontal airflow and heavy-duty stainless construction. Investing in the proper tool upfront prevents wasted ingredients and safeguards your pet's health.
Review your primary ingredient list today. Decide whether you plan to focus mostly on raw proteins or garden produce. Calculate your required batch capacity and preferred fan placement. Once you determine your specific needs, shortlist fully digital models that meet your exact specifications and start drying confidently.
A: No. Cross-contamination risks and vastly different temperature requirements make mixed batches unsafe. Raw meat demands 160°F to kill pathogens, while fruits and vegetables process best around 130°F. Juices from raw proteins can also drip onto produce, spreading dangerous bacteria throughout the entire machine.
A: Context matters heavily here. If your machine cannot reliably maintain an internal air temperature of 160°F, pre-cooking is necessary. USDA guidelines recommend heating meat in an oven at 275°F for 10 minutes prior to drying if your equipment lacks adequate digital thermal precision.
A: When fully conditioned and unpreserved, homemade treats last 1 to 2 weeks at room temperature. You can extend this to 1 month by storing them in an airtight container in the refrigerator. Vacuum-sealed treats stored in a deep freezer will safely last up to 6 months.
A: Recipes offer baseline estimates. Ambient room humidity, thick or uneven slicing, and overloading your trays severely restrict internal airflow. Poor air circulation traps humidity inside the chamber, extending the necessary processing times significantly. Always leave adequate space between individual pieces.


