
Please Choose Your Language
Views: 0 Author: Site Editor Publish Time: 2026-09-23 Origin: Site


In pet food and treat production, profitability and product safety tie directly to precise moisture control and water activity (Aw) reduction. Improper tray loading leads to uneven drying, case hardening, and localized moisture pockets. These wet spots promote mold growth and pathogen survival, such as Salmonella or E. coli. This results in wasted batches and dangerous product recalls. Mastering tray loading protocols is an operational necessity. It serves as a primary factor when evaluating equipment upgrades, determining batch scalability, and establishing standard operating procedures (SOPs) for high-yield production. Consistent loading guarantees consistent drying. You must standardize how staff place raw ingredients onto racks. Airflow needs clear pathways to extract moisture efficiently. When you control the physical layout of the meat or vegetable slices, you control the evaporation rate. This protects your product, your customers, and your facility's reputation.
Uniformity Dictates Safety: Consistent slicing, even spreading, and strict single-layer spacing are mandatory to ensure even airflow and prevent dangerous moisture retention in pet treats.
Airflow Design Impacts Labor: Horizontal airflow systems reduce the need for manual tray rotation compared to vertical airflow models, directly impacting labor costs in a multi tray food dehydrator setup.
Material Matters for Sanitation: A stainless steel food dehydrator offers superior thermal retention and easier sanitation protocols compared to plastic alternatives, crucial for raw meat processing.
Capacity vs. Efficiency Trade-offs: Upgrading to a commercial food dehydrator requires recalculating tray loading density to balance maximum throughput with required drying times.
Achieving a safe water activity level (Aw) below 0.60 is the primary goal of dehydration in pet food. At this threshold, bacteria, yeast, and mold lack the free water necessary to multiply. You must hit this metric without degrading the nutritional profile of the raw ingredients. High heat destroys essential vitamins and enzymes. Low heat allows bacteria to multiply before the food dries. Tray loading acts as the physical bridge between temperature and moisture removal. If you load trays incorrectly, you cannot achieve a uniform Aw across the batch. Some pieces will over-dry and turn brittle. Others will retain internal moisture and become breeding grounds for pathogens. We measure Aw using specialized meters on the production floor. You take samples from different zones on the tray. If the center pieces read 0.65 and the edge pieces read 0.55, your loading protocol failed.
Dehydration relies on moving air to carry moisture away from the product surface. Air travels across the exposed surface area of the ingredients. As the heating elements warm the air, its capacity to hold water increases. This warm air absorbs surface moisture from the pet treats. The exhaust system then vents this humid air out of the chamber. Ambient humidity plays a massive role here. If your processing room sits at 70% humidity, the machine works much harder than in a 30% humidity environment. Install dehumidifiers in your processing room to maintain ambient humidity below 45%. Tray density directly impacts this airflow inside the machine. Densely packed trays block the wind channel. The air stalls, drops its temperature, and leaves moisture behind. You must leave enough empty space on the tray to allow air to flow horizontally across every single piece of food. We calculate airflow in cubic feet per minute (CFM). A high CFM rating means nothing if a wall of overlapping meat blocks the fan.
Case hardening occurs when the exterior of a product dries too quickly. A hard shell forms on the outside of the meat or vegetable. This shell traps internal moisture. The outside looks perfectly dry, but the inside remains raw and wet. Overloading trays restricts airflow and exacerbates this problem. When air cannot move freely, heat builds up unevenly. The pieces on the edges of an overloaded tray take the brunt of the heat. They case-harden quickly. The trapped moisture inside these pieces provides a perfect environment for pathogen survival. You cannot fix case hardening once it happens. The batch goes into the trash. Proper spacing prevents the rapid exterior drying that causes this dangerous condition. Operators often mistake case-hardened jerky for finished product. They bag it, and two weeks later, the bag inflates with mold.
You cannot achieve even drying if your ingredients are different sizes. Uniform sizing is the absolute foundation of safe dehydration. Establish exact thickness requirements for all raw meats and vegetables. A standard thickness of 1/4 inch to 3/8 inch works best for jerky and sweet potatoes. Thicker slices take exponentially longer to dry and increase the risk of case hardening. Manual cutting with a knife rarely produces consistent results. Human error leads to wedge-shaped slices. One end dries while the other stays wet. You should use commercial meat slicers or mandolines. These tools standardize the thickness of every piece. Standardized slices lead to predictable drying times. Predictable drying times improve your overall production efficiency and safety margins. Keep slicer blades sharp. A dull blade tears the meat fibers, creating an uneven surface that dries inconsistently. Sanitize the slicer every four hours during continuous operation to prevent bacterial buildup.
Different ingredients contain different starting moisture levels. Chicken breast has a different water content than beef liver or carrots. You must categorize your ingredients by their initial moisture content before loading. Never mix high-moisture and low-moisture items on the same tray. The high-moisture items will release water vapor. This vapor will rehydrate the low-moisture items nearby. Group similar-moisture items on the same trays. If you must dry different ingredients in the same machine, place high-moisture items on the bottom trays. This prevents moisture from dripping down onto drier items. It also prevents cross-contamination.
Ingredient Category | Initial Moisture Level | Recommended Slicing Thickness | Tray Loading Strategy | Target Aw |
|---|---|---|---|---|
Raw Poultry (Chicken, Turkey) | High (70-75%) | 1/4 inch (6mm) | Bottom trays only. Strict 1/2 inch spacing. | < 0.60 |
Raw Beef / Venison | Moderate-High (60-70%) | 1/4 inch to 3/8 inch | Middle to bottom trays. 1/4 inch spacing. | < 0.60 |
Organ Meats (Liver, Kidney) | High (75-80%) | 1/4 inch (partially freeze before slicing) | Bottom trays. Requires extended drying time. | < 0.60 |
Root Vegetables (Sweet Potatoes) | Moderate (50-60%) | 1/8 inch to 1/4 inch | Top trays. Can be spaced slightly closer. | < 0.65 |
Apples / Bananas | High (80%+) | 1/4 inch | Top trays. Use silicone liners to prevent sticking. | < 0.60 |
When operating a food dehydrator, the single-layer rule is absolute. You must ensure zero overlapping or stacking of raw ingredients. If two pieces of meat touch, the contact point will not dry. This creates a wet spot that harbors bacteria. Provide specific spacing metrics for your staff. A minimum of 1/4 inch between pieces is required for most jerky products. This gap allows unobstructed horizontal air movement. The air must travel between the pieces, not just over them. If pieces shrink during drying, the airflow will improve. However, you must base your initial spacing on the raw, un-shrunk size. Never cram extra pieces onto a tray to save time. It will cost you an entire batch in spoilage.
Drying purees, mashed dog food, or yogurt drops requires a different approach than whole muscle meats. You cannot rely on a meat slicer for consistency here. Achieving an even spread is your primary challenge. Use offset spatulas to spread mashed mixtures. Leveling guides help maintain a consistent thickness across the entire tray. You must prevent thick spots. Thick spots harbor moisture and take hours longer to dry than thin spots. Silicone molds offer another excellent solution for purees. They guarantee uniform size and shape for every treat.
Portion-controlled loading simplifies your packaging process. Pre-measure serving sizes per tray. For example, spread exactly one daily serving or one can equivalent per tray. When the dehydration cycle finishes, you know exactly how much product goes into each bag. You will likely use silicone liners, parchment paper, or specialized solid trays for purees. Note that these solid barriers restrict bottom airflow. The air can only dry the top surface of the puree. You must adjust your drying times accordingly. You will often need to flip the puree sheet halfway through the cycle to dry the underside.
You want to maximize your yield per square foot of tray space. However, you cannot compromise the dehydration curve. Calculate your maximum capacity by testing different spacing layouts. To optimize your tray capacity without ruining the batch, follow these steps:
Weigh an empty tray and record the tare weight.
Load the tray with raw ingredients using the standard 1/4-inch spacing rule.
Weigh the fully loaded tray to determine the raw product weight.
Run the dehydration cycle until the product reaches the target water activity level.
Weigh the finished tray to calculate the moisture loss percentage.
Adjust the spacing on the next batch by 1/8 inch and repeat the process to find the maximum yield threshold.
If adding 10% more raw weight to a tray increases the drying time by 30%, you have exceeded optimal capacity. The extra time and energy cost more than the extra yield is worth. Create a visual guide for your loading staff. Show them exactly how a properly loaded tray should look. This removes guesswork and standardizes your capacity utilization.
The direction of airflow dictates how you load and manage your trays. Horizontal airflow systems feature rear-mounted fans. These fans push air evenly across all trays simultaneously. The air travels parallel to the food. This design provides uniform drying from top to bottom. Vertical airflow systems feature bottom-mounted or top-mounted fans. The air must push through the trays to reach the opposite end of the machine. The trays closest to the fan dry much faster than the trays furthest away. Vertical systems often require intensive manual tray rotation. You must stop the machine, open the door, and physically move the bottom trays to the top. This disrupts the heat cycle and increases labor costs.
Managing a multi tray food dehydrator introduces new operational trade-offs. When you scale up to 10, 20, or 40 trays, manual rotation becomes a massive labor burden. You need horizontal airflow to make large-scale production viable. Batch tracking becomes necessary as tray counts increase. You cannot just look at a 40-tray machine and know which trays hold which cuts of meat. Implement a tray mapping system. Assign specific ingredients to specific zones in the dehydrator. Track the loading time, the ingredient type, and the target completion time for every section. This prevents over-drying and ensures quality control across massive batches.
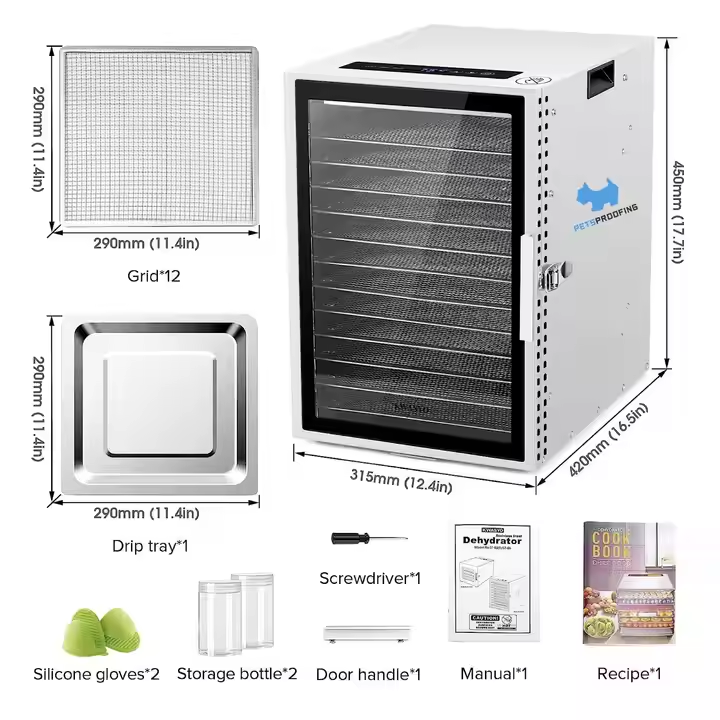
The material of your dehydrator impacts both sanitation and thermal efficiency. A stainless steel food dehydrator is non-porous. It does not absorb odors, fats, or bacteria. This is critical when processing raw meat. Plastic trays scratch easily. These microscopic scratches become breeding grounds for Salmonella. You cannot sanitize scratched plastic effectively. Stainless steel withstands harsh chemical cleaners and high-heat washing. Furthermore, stainless steel retains internal ambient heat better than plastic. The metal walls reflect heat back into the chamber. This leads to more stable drying cycles and faster recovery times after you open the door to check the product.
Eventually, a growing pet treat business outgrows prosumer models. You must assess when your volume demands an upgrade. A true commercial food dehydrator offers features that change your loading SOPs. Commercial units feature programmable temperature phasing. You can program the machine to run at a high temperature for the first two hours, then automatically drop to a lower temperature for the remainder of the cycle. They offer higher wattage for faster moisture extraction. They also feature much larger tray surface areas. You will need to update your loading protocols to match the new dimensions. A commercial unit can handle denser loads if the exhaust fans are powerful enough, but the single-layer rule always remains in effect.
Even in high-end machines, you may encounter slight temperature variances. Identify when tray rotation is necessary. It is primarily required in vertical airflow units or densely packed horizontal units. If you notice the back edges drying faster than the front edges, you must rotate. Outline a systematic rotation schedule for your staff. Do not rotate randomly. A standard protocol involves a top-to-bottom and front-to-back swap at the halfway mark of the drying cycle. Pull the trays out, spin them 180 degrees, and place the top trays on the bottom racks. This ensures every piece of food experiences the exact same thermal environment over the total cycle time.
Safe dehydration of raw meat requires specific temperature management. Establish baseline starting temperatures for raw meats. You typically start between 158°F to 167°F (70°C to 75°C). This high initial heat initiates safe dehydration and begins to kill surface bacteria. However, dehydration alone does not guarantee pathogen destruction. As the meat dries, evaporative cooling lowers the internal temperature of the food. The air might be 165°F, but the meat might only reach 130°F. This is dangerous.
You must implement a lethality step to ensure compliance and safety. The USDA and FDA recommend a lethality treatment for raw meat pet treats. This involves a post-dehydration oven treatment. You place the dried treats in a preheated oven at 257ºF to 275ºF for 10 to 15 minutes. This spikes the internal temperature of the dried meat to the critical 160ºF to 165ºF range, destroying any surviving Salmonella or E. coli. Tray loading density impacts the time required to reach this critical internal temperature. Densely packed trays take longer to heat up in the oven. Space the dried treats out on baking sheets just as carefully as you spaced them in the dehydrator.
You must train your staff to recognize the symptoms of poor loading. Uneven drying patterns are the first sign of a problem. If you bend a piece of jerky and the center feels pliable or spongy while the edges crack, the center is still wet. This usually indicates the slices were too thick or the trays were overloaded. Condensation on the dehydrator doors or walls is another major red flag. It means the exhaust system cannot keep up with the moisture release. You either loaded too much high-moisture food, or the ambient room humidity is too high. If your drying times consistently exceed 24 hours for standard jerky, your airflow is restricted. You need to reduce your tray density immediately.
Cross-contamination is a severe implementation risk. You must address the dangers of loading different proteins together. Never load raw poultry above beef, pork, or vegetables. Raw chicken carries a high risk of Salmonella. If chicken juices drip onto beef jerky on a lower tray, you have contaminated the entire batch. Establish strict vertical loading hierarchies. Place the highest risk meats on the very bottom trays. Place vegetables and fruits on the top trays. Beef and pork go in the middle. If a bottom tray drips, it only hits the drip pan, not other products. Sanitize the drip pan and all trays thoroughly between every single batch.
Audit your current slicing tools and upgrade to a commercial slicer to guarantee uniform ingredient thickness across all batches.
Draft and post a strict, written standard operating procedure (SOP) for single-layer loading with a mandatory 1/4-inch spacing rule at all workstations.
Establish a vertical loading hierarchy that places all raw poultry on the bottom racks to prevent drip contamination onto other products.
Integrate a post-dehydration oven lethality step into your daily production schedule to ensure complete pathogen destruction and regulatory compliance.
A: It depends on the airflow design. Horizontal airflow systems with rear-mounted fans usually do not require rotation. Vertical airflow systems with bottom or top fans require frequent rotation because the trays closest to the fan dry much faster.
A: You should leave a minimum of 1/4 inch of space between every piece of raw meat or vegetable. Never overlap ingredients. This gap allows horizontal airflow to reach all sides of the product, preventing wet spots.
A: No. Overlapping meat blocks airflow and traps moisture between the pieces. This leads to uneven drying and creates a breeding ground for bacteria and mold. Always stick to a strict single-layer loading protocol.
A: Stainless steel is non-porous, meaning it will not absorb bacteria, fats, or odors from raw meat. It is much easier to sanitize than plastic, which can scratch and harbor pathogens. It also retains heat better for stable drying.
A: Use an offset spatula and a leveling guide to spread the puree evenly across a silicone liner. You can also use silicone molds to ensure every treat is the exact same thickness and size.
A: The lethality step is a post-dehydration heat treatment designed to kill surviving pathogens like Salmonella. You place the dried treats in an oven preheated to 257ºF to 275ºF for 10 to 15 minutes to spike the internal temperature.


